Here is step by step guide to post tweet automatically to your twitter handler using C# .Net MVC. So, whenever you publish any content in your CMS website, you can tweet the same automatically same time.
Part 1 Configuring your twitter handler access tokens.
First things we need is the Twitter account details to get the Access Token, Access Secret Key and Content Key.
Step 1: Login with your credentials on twitter site.
Once you are done with the login go to link developer site url https://apps.twitter.com/
Step 2: You will see button Create New App as below.

After clicking on the button you will get the Create an application form.
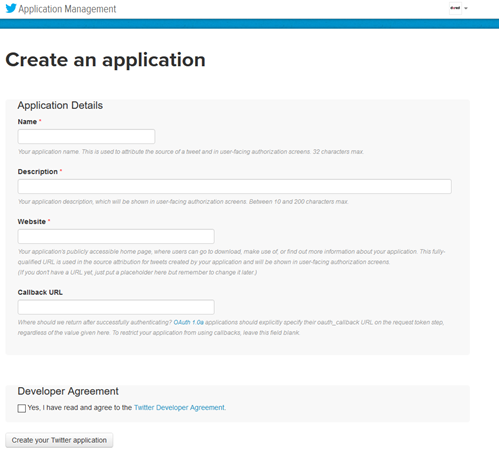
Step 3: Fill the form as per your app integration details.
Name – Enter the Name of the Twitter app you are creating.
Description – Enter the Description of the App which you are creating.
Website – Enter the Name of the website where you are going to Use this Code or App.(the website URL should be genuine or else you will not able to create the App)
Callback URL – Enter the Callback URL when after authentication the user will go.
Accept the Term & Condition or Developer Agreement.
Create Your App. After Creating your app you will see the screen as below.
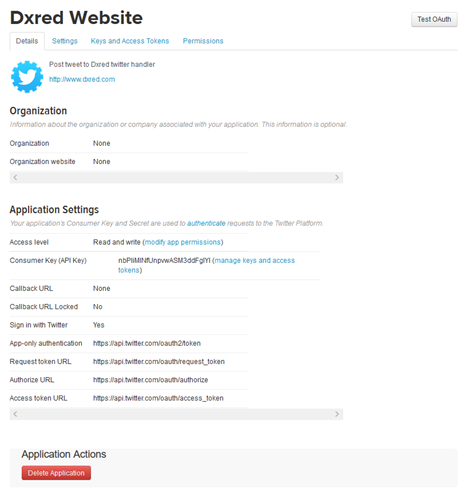
Step 4: You will be able to see the basic details & Consumer Key API key on the screen.
Now go to the Keys and Access Tokens Tab & you will see you confidential details as the below screen.
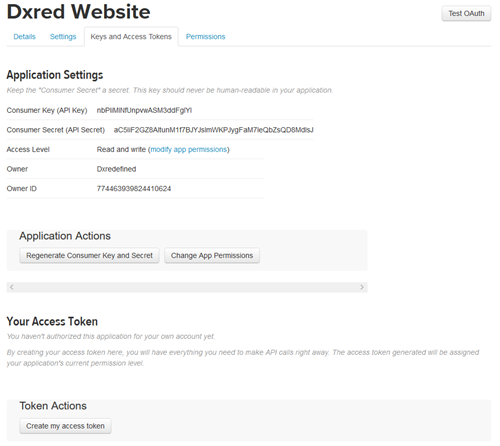
Step 5: As you can see you will be having the Consumer Key & Secret key on the screen, but the Access key & Secret key is still not generated.
To generate that click the button create my access token below on the same screen.

Click on the button and you will get the Access Key & Secrete Key on the same page at the same place.
See in the below screen
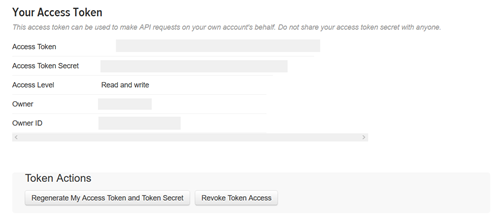
Note down all your credentials carefully because without this you cant create you web application to publish a post on twitter without login.
After configuring your twitter app, we will be moving towards the Web Application C# Part.
Part 2 Coding
Open the Visual Studio & Create a MVC Project.
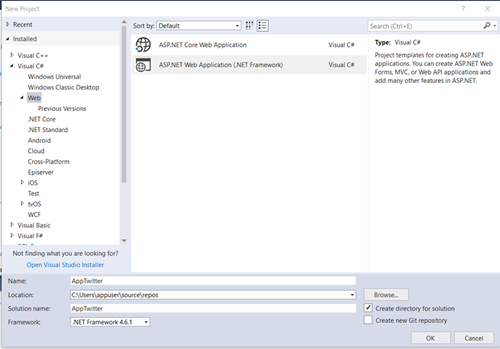
Enter the Name of the Project whatever you want then press Ok.
Select MVC Project Option & Create It.
Now open the Solution Explorer & Goto >>Models Folder >>Right Click >>Add new File Class File >>Name as “Tweet.cs”
Paste the below code inside it .
using System;
using System.Collections.Generic;
using System.Linq;
using System.Web;

namespace AppTwitter.Models
{
    public class Tweets
    {
        public string tweets { get; set; }
    }
}
Now open the Solution Explorer & Goto >>View Folder >>Home Folder>>Index.cshtml File .
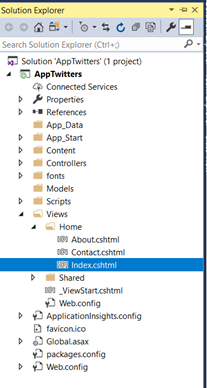
Delete All the HTML Code form It & Paste the Below code to create you Textbox & Your Tweet Button.
Paste the Below Code into your File .
@model AppTwitter.Models.Tweets
@{
    Layout = null;
}
<!DOCTYPE html>
<html>
<head>
    <meta name="viewport" content="width=device-width" />
    <title>Index</title>
</head>
<body>
@using (Html.BeginForm("Index", "Home", FormMethod.Post))
{
    <div class="form-control">
    <label class="label-primary">     Enter Your Tweet  </label>@Html.TextBoxFor(m => m.tweets)<br />
    <input type="submit" value="Submit" />
    </div>
}
</body>
</html>
This above code will render the text box & a button on your screen.
After Completing you Model & View we will go-to the Controller which going to perform the Posting of the Post’s to the twitter .
Now Open the Home Controller which is made by default in you folder structure (Solution Explorer).
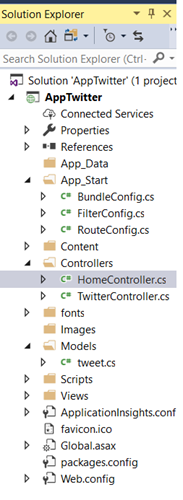
Now in the Home Controller File paste the below code.
In the Controller I have provided a static Tweet image section to tweet a image with text.
using AppTwitter.Models;
using System;
using System.Collections.Generic;
using System.IO;
using System.Linq;
using System.Web;
using System.Web.Mvc;
using TweetSharp;

namespace AppTwitter.Controllers
{
    public class HomeController : Controller
    {
        public ActionResult Index()
        {
            return View();
        }

        [HttpPost]
        public ActionResult Index(Tweets twts, HttpPostedFileBase postedFile)
        {
            string key = "Your Key";
            string secret = "Your Key Secret";
            string token = "Your Token Key";
            string tokenSecret = "Your Token Secret";

            string message = twts.tweets;

            //Enter the Image Path if you want to upload image .

            // string  imagePath = @"C:\Users\appuser\Pictures\Dummy.jpg"; (Enter the Image path Here )

            var service = new TweetSharp.TwitterService(key, secret);
            service.AuthenticateWith(token, tokenSecret);

            //this Condition  will check weather you want to upload a image & text or only text
            if (imagePath.Length > 0)
            {
                using (var stream = new FileStream(imagePath, FileMode.Open))
                {
                    var result = service.SendTweetWithMedia(new SendTweetWithMediaOptions
                    {
                        Status = message,
                        Images = new Dictionary<string, Stream> { { "john", stream } }
                    });
                }
            }
            else // just message
            {
                var result = service.SendTweet(new SendTweetOptions
                {
                Status = message
                });
            }

            twts.tweets = "";
            return View();
        }
    }
}
Remember Enter the Access Token Key, Secret Key & other two keys to avoid any post error.
After doing above steps properly. Run the Project.
You will see a Screen which will have a Text box & button with it.

Enter you tweet and press submit.
Example I will Write a “Hello Twitter How are you” in textbox at time of 3.13.
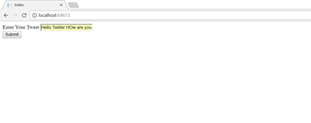
And on twitter at the same time the same tweet has been posted.

Now suppose you want to pass the image in the tweet just pass the image URL in the Home Controller, as I have commented the below line just uncomment it & put the file path.
string imagePath = @"C:\Users\appuser\Pictures\Dummy.jpg";
now again run the project & see what it tweet.

Tweet will be visible on your twitter page.

You can make the image upload dynamic buy putting a file upload input field in it.
